OrbitalWP and BricksForge Integration
The OrbitalWP and Bricksforge Integration was created to help user manage their tasks with a front end Bricksforge Pro Form. We have created many dynamic data tags and custom query loops specifically for Bricksforge Pro Form users.
This quick-start guide shows you how to create a front end Pro Form who’s job is to update your Orbital tasks.
In this tutorial, you will learn:
- How to update Orbital task post meta data
- How to built the nestable Pro Form
- How to configure the Pro Form actions
- How to power the form with Orbital’s dynamic data tags and custom query loops
What You Need To Follow This Tutorial
- Orbital Plugin
- Bricks Builder + Bricks Forge Pro
- Administrator access
Dynamic Data Tag Reference
| Dynamic Tag | Shows |
|---|---|
{orb_cf_start_date} | Start date in readable format |
{orb_cf_due_date} | Due date in readable format |
{orb_cf_priority} | Task priority (high/normal/low) |
{orb_cf_approval_status} | Current approval status |
Meta Keys Reference
| Field | Meta Key | Accepted Values |
|---|---|---|
| Priority | _orb_cf_priority | high, normal, low |
| Start Date | _orb_cf_start_date | Y-m-d format (2025-01-15) |
| Due Date | _orb_cf_due_date | Y-m-d format (2025-01-15) |
| Status | _orb_cf_approval_status | approved, rejected, etc. |
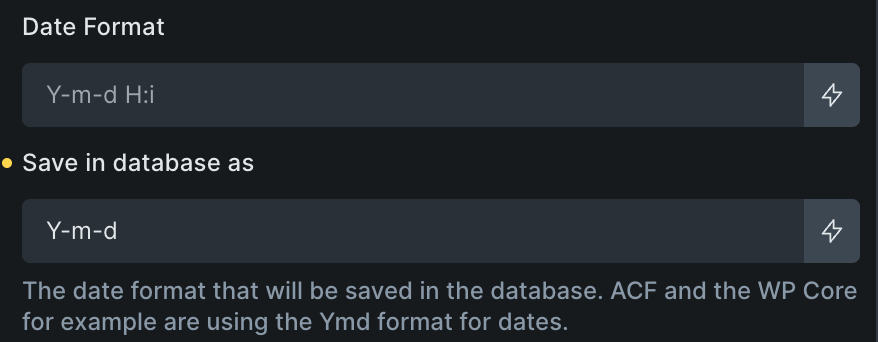
🚨 CRITICAL: Date Format Configuration
Before building any forms, make note of the date format required by OrbitalWP:
In Bricks Forge date field settings:
- Change “Date Storage Format” from
YmdtoY-m-d - This prevents dates from disappearing in the WordPress editor
- Affects:
_orb_cf_start_dateand_orb_cf_due_datefields
Why this matters: WordPress expects MySQL date format (Y-m-d). Bricks Forge’s default Ymd format won’t work with Orbital. But you can easily change this in the Pro Form date field settings. Thank you Danielle for this setting!
Build The Pro Form With Update Post Meta Action
To update the meta data on an Orbital task with Bricksforge, create a Pro fFrm with the action set to “update post meta”.
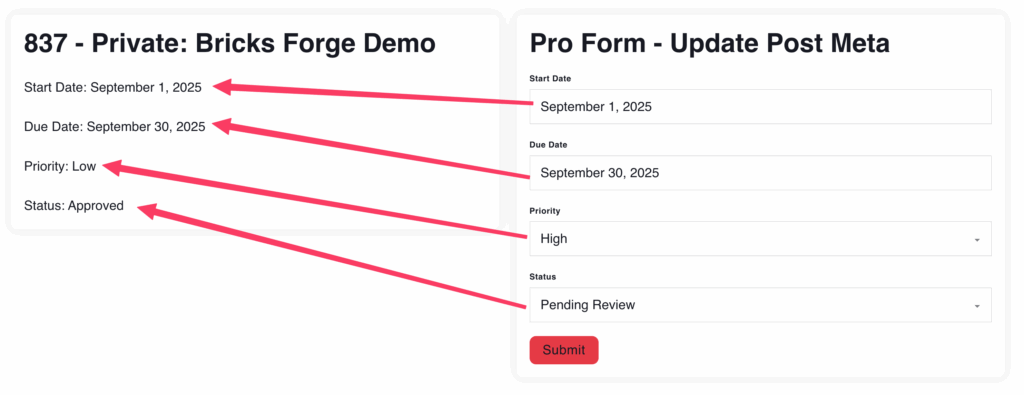
The Bricksforge Pro Form integration opens up the door to task editing a task with a Bricks Builder template. You control the style, conditions, and actions for updating a task’s meta data!
This image demonstrates how the Pro Form will update Orbital Task ID 837. When you submit the form, the task’s post meta data is replaced in the database. We update the start date, dues date, priority, and approval status files.
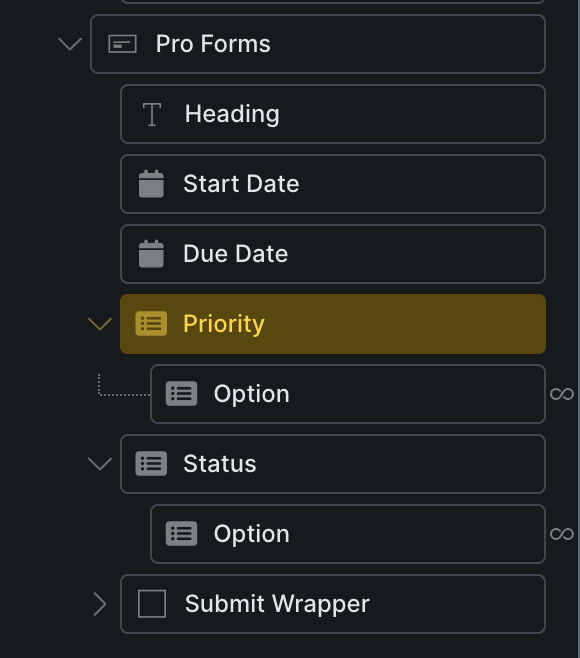
Create the Bricks Forge Pro Form
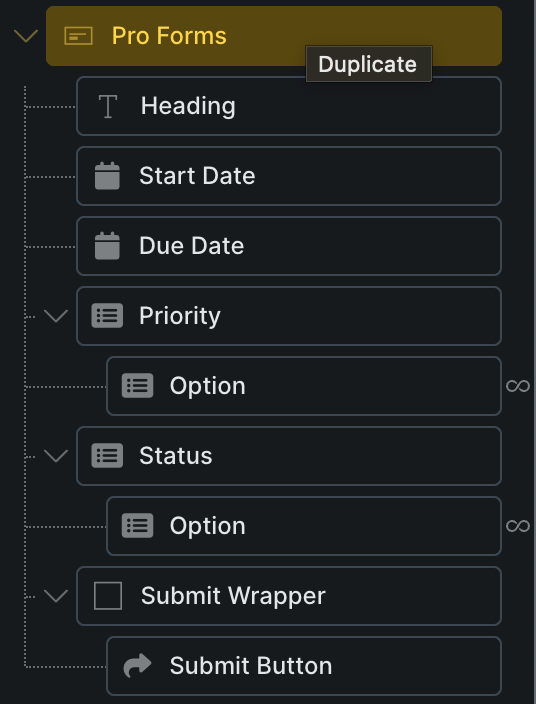
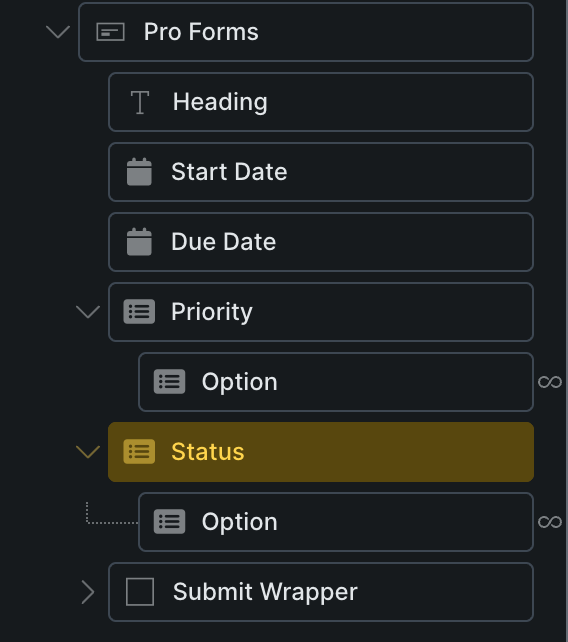
First, add a Pro Form element to your template or page. Delete all the default fields and add these four fields below. Make sure to give each field a custom ID. I recommend using my field names to follow along with this tutorial. I show you all of those details below.
Building The Form
In this section, you can see the form structure, the form field settings, and form actions. Let’s start by taking a look at the form structure panel.
Form Structure Panel
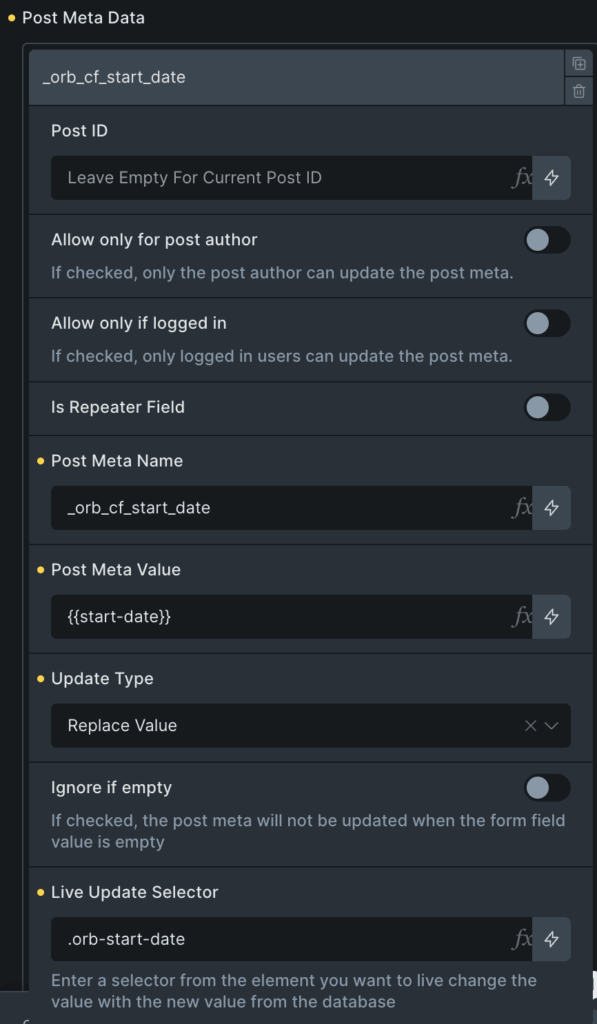
1. Date Field – Start Date – Meta Field _orb_cf_start_date
Give this field a custom id start-date
Add the dynamic data tag {orb_cf_start_date} fto the value parameter. This will auto populate the form on the front end with whatever is stored in the start date for the task. This will save you some headache when you want to overwrite one of the other fields. If you leave it blank, then you have to pick a date every time or else it overwrites the field to null.
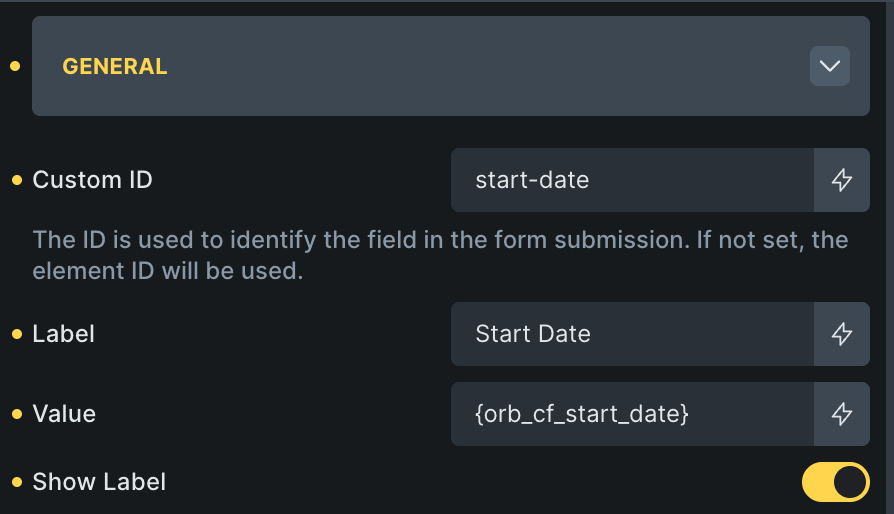
🚨 Critical Settings: Date Storage Format: Y-m-d (not Ymd!)
If you don’t set the Y-m-d setting, Bricks Forge will still overwrite the data in the database, but when you edit the task directly, the date will appear null even though data is in the database.
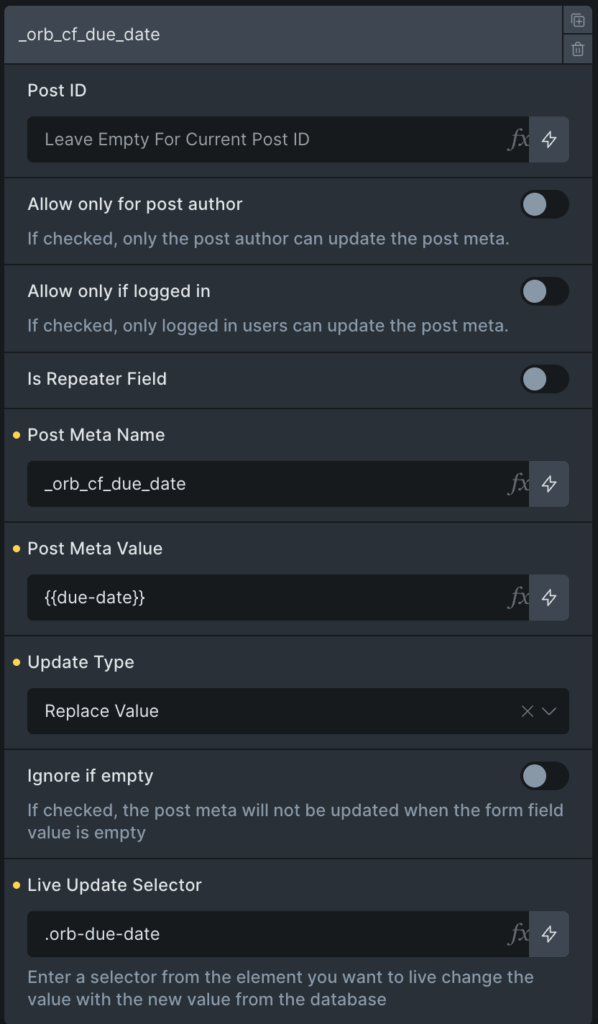
2. Date Field – Due Date – Meta Field _orb_cf_due_date
Give this field a custom id due-date
Add the dynamic data tag {orb_cf_due_date} to the value parameter.
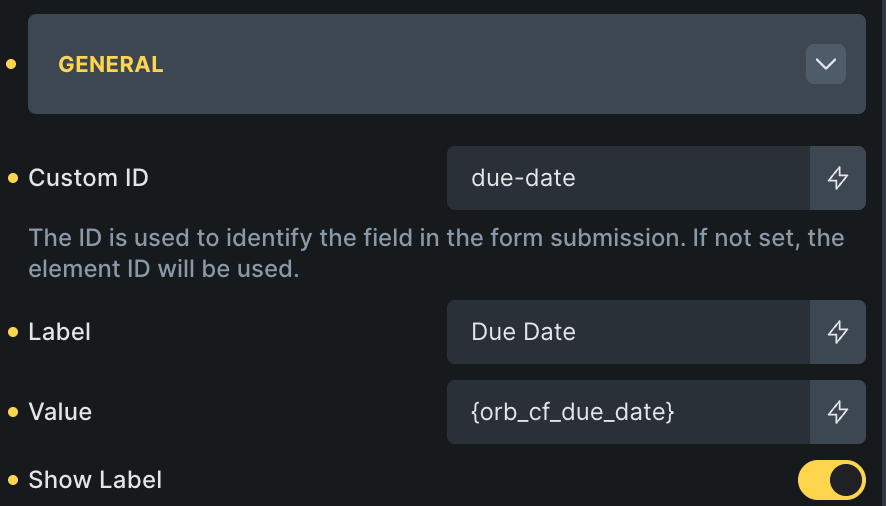
🚨 Critical Settings: Date Storage Format: Y-m-d (not Ymd!)
If you don’t set the Y-m-d setting, Bricks Forge will still overwrite the data in the database, but when you edit the task directly, the date will appear null even though data is in the database.
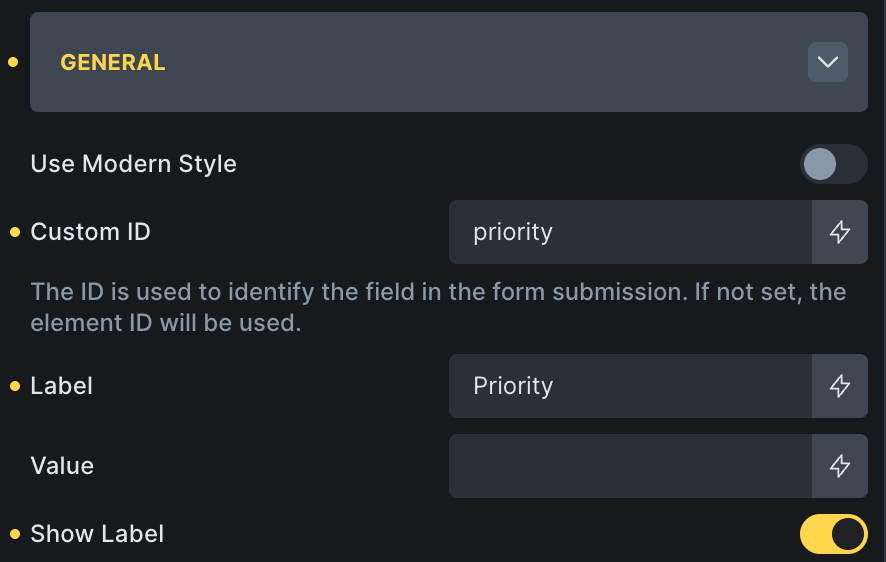
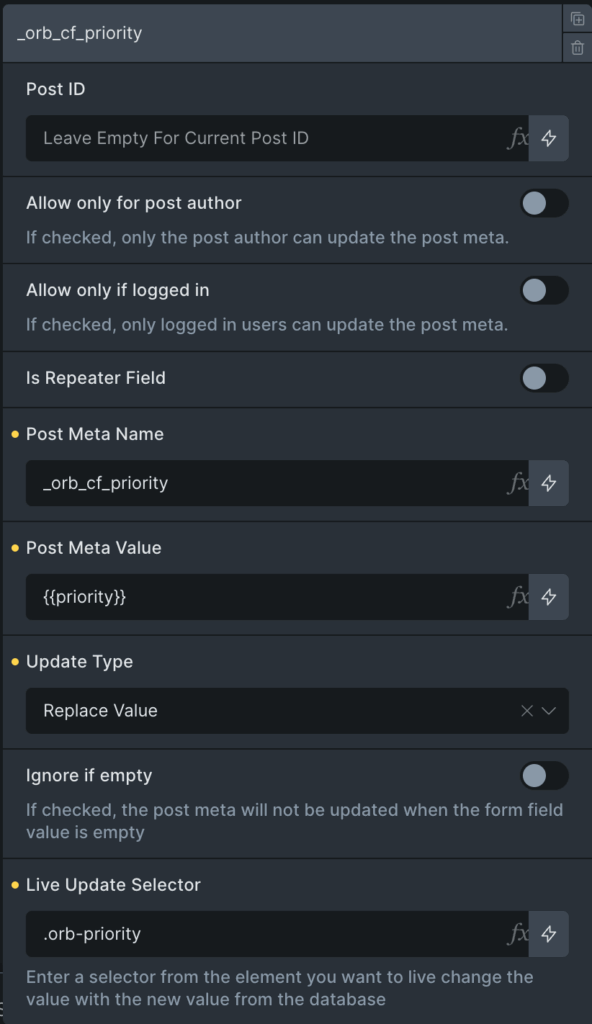
3. Select Field – Priority – Meta Field _orb_cf_priority
Give this field a custom id orb-priority
Since this is a select field, we can leave the value blank. OR if you want to add the dynamic data tag to pull in the existing value, you can use {orb_cf_priority_key}
Continue Configuring the Priority Select Field
With Bricksforge Pro Form, you can pull the options of a select field through a query loop. We need to configure the select field to use Orbital’s custom query loop to loop through the Priority field options.
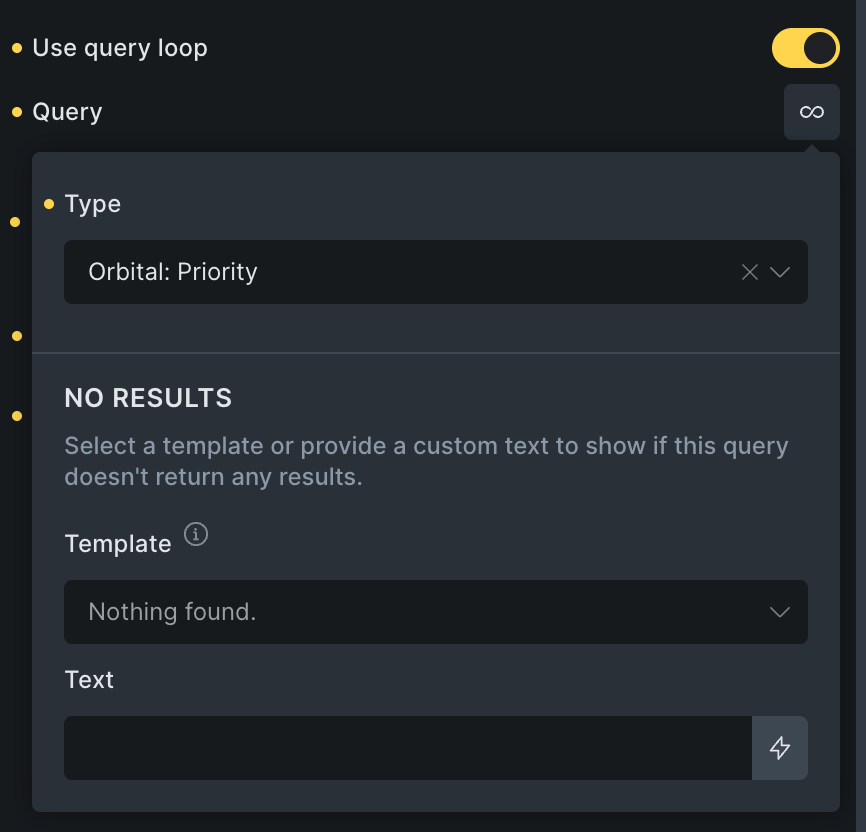
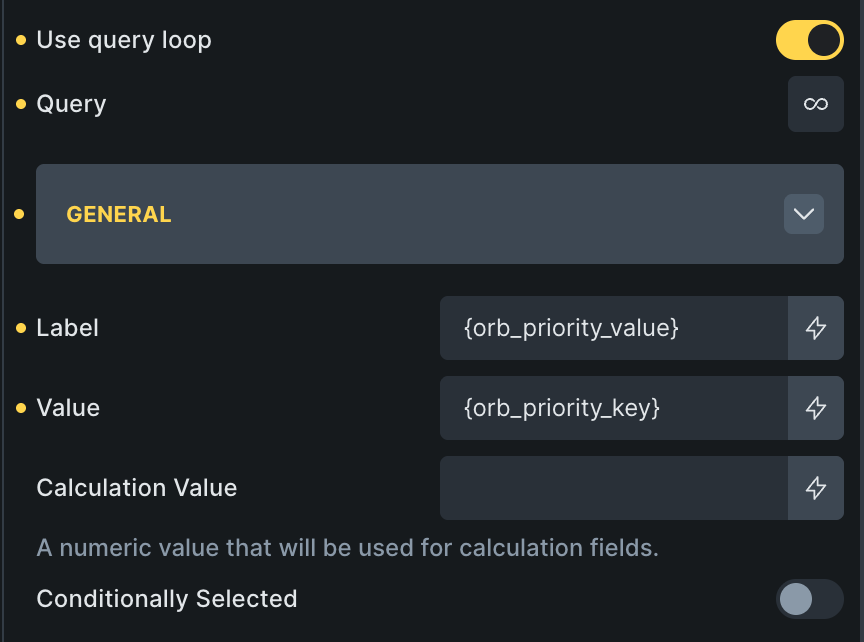
Set the Option Label to {orb_priority_value} and the Option Key to {orb_priority_key}
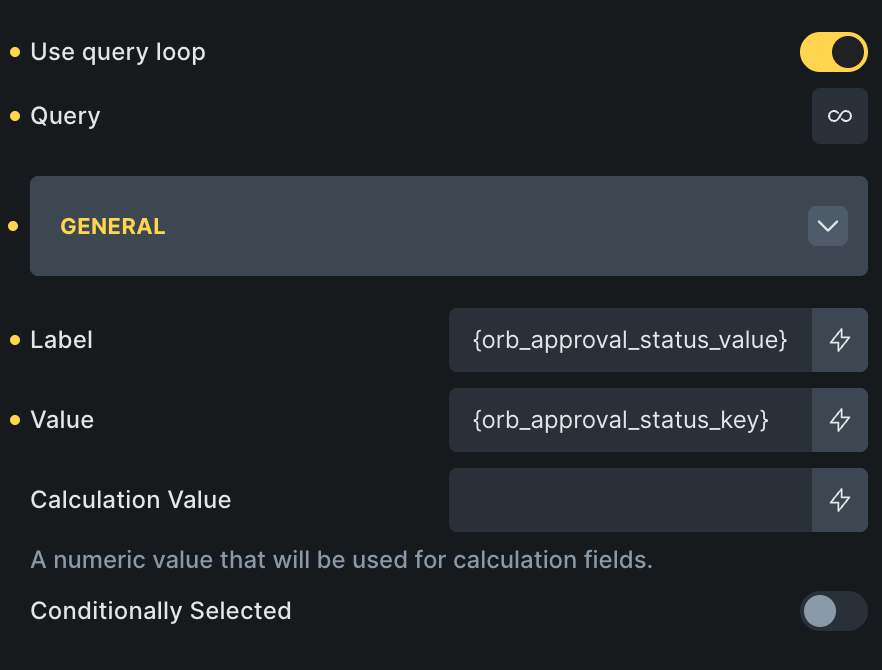
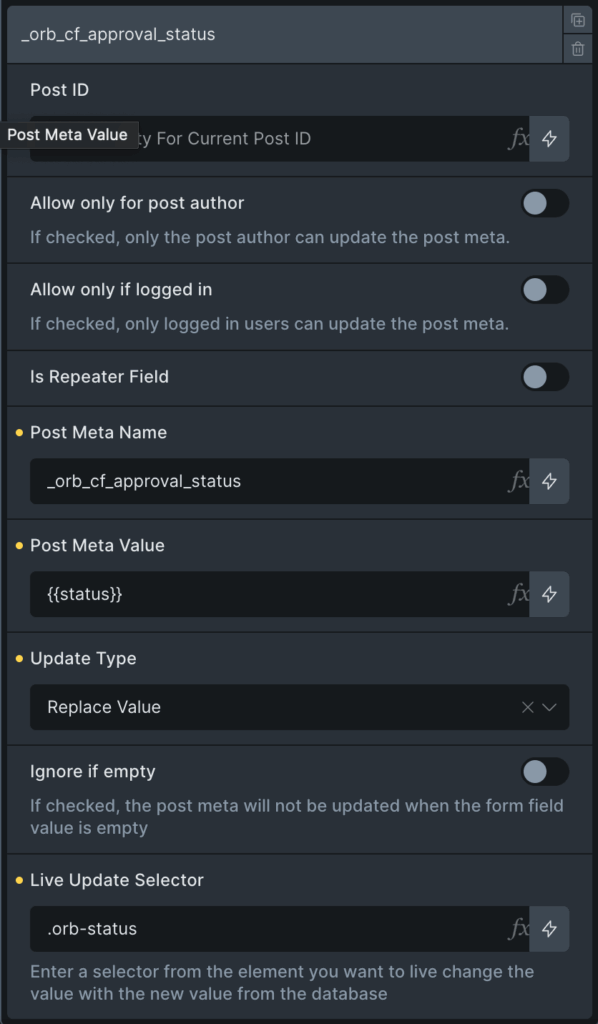
4. Select Field – Approval Status – Meta Field _orb_cf_approval_status
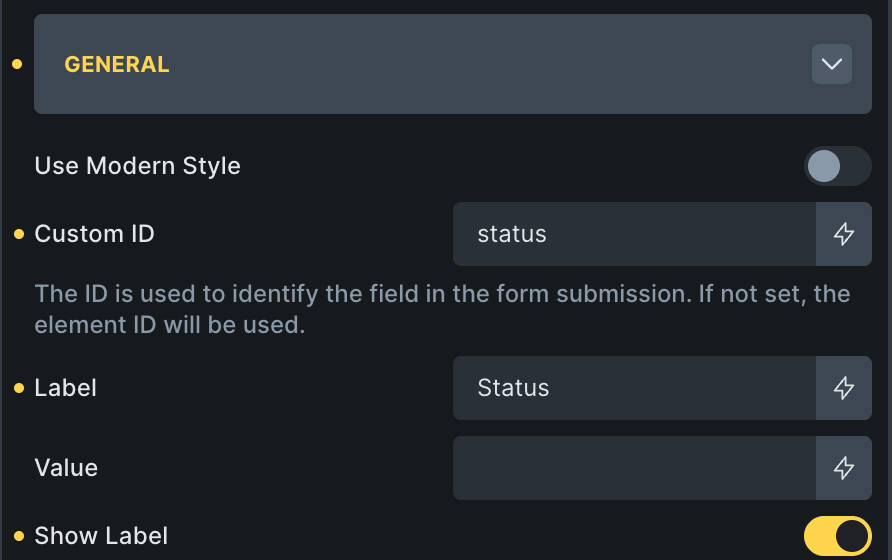
Give this field a custom id status
Since this is a select field, we can leave the value blank. OR if you want to add the dynamic data tag to pull in the existing value, you can use {orb_approval_status_key}
Continue Configuring the Priority Select Field
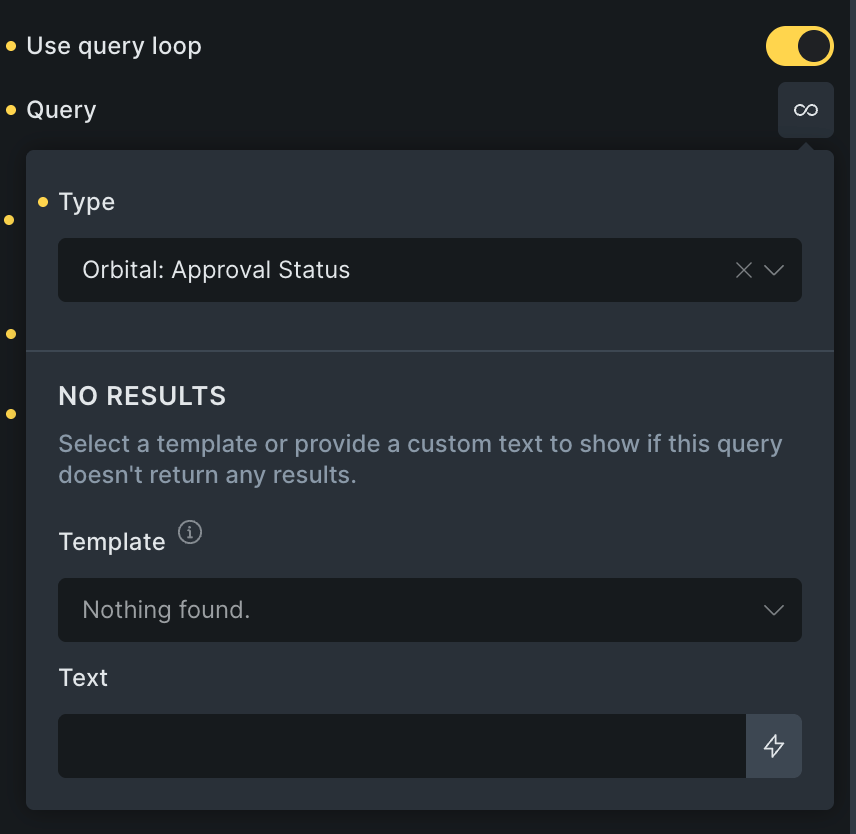
We use the same setup as the Priority field, but choose the Approval query loop.
Set the Option Label to {orb_approval_status_value} and the Option Key: {orb_approval_status_key}
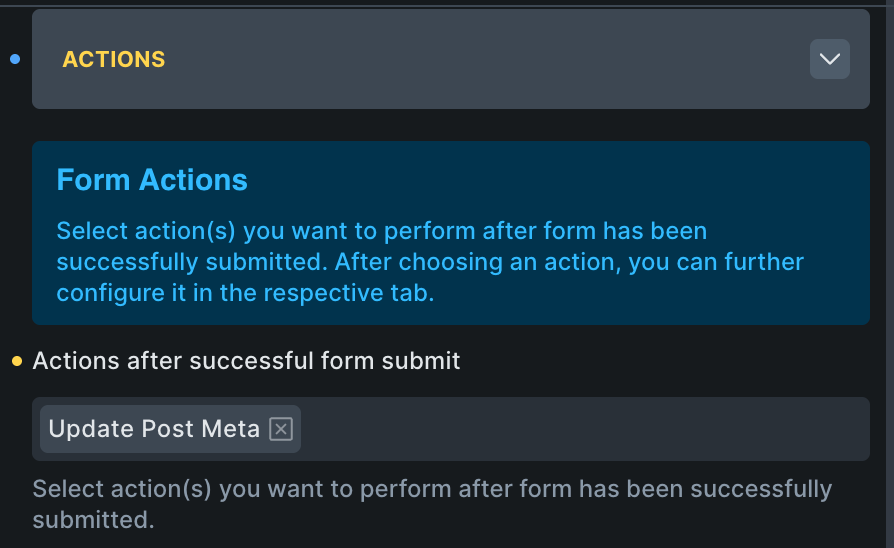
Configure Form Actions
For this example, we are updating the post meta of the Orbital Task custom post type. You need to set the form action to Update Post Meta. You can add other actions too!
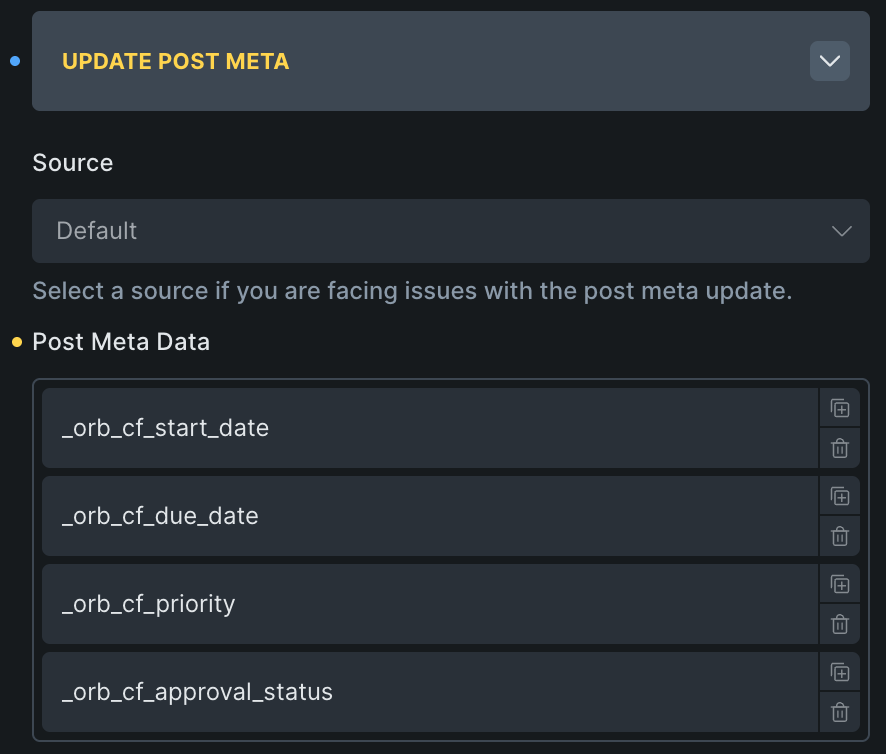
Next, we need to map our form fields to the appropriate post meta field names. The image below shows what it should look like after you configure each field. The following sections will show what the settings should look like inside each form field to post meta data mapping item.
For reference here are the mappings one more time. I recommend making sure to give each form field a custom ID.
- Date Field – Start Date → Map to: Meta Field
_orb_cf_start_date- Give this field a custom id
orb-start-date
- Give this field a custom id
- Date Field – Due Date → Map to: Meta Field
_orb_cf_due_date- Give this field a custom id
orb-due-date
- Give this field a custom id
- Select Field – Priority → Map to: Meta Field
_orb_cf_priority- Give this field a custom id
orb-priority
- Give this field a custom id
- Select Field – Approval Status → Map to: Meta Field
_orb_cf_approval_status- Give this field a custom id
orb-approval-status
- Give this field a custom id
Start Date Field Settings
Due Date Field Settings
Priority Field Settings
Approval Status Field Settings
Common Issues & Solutions
Issue: Form Submits But No Task Created
Solution: Verify post type is set exactly to orb_task (not “orb-task” or “orbital_task”)
Issue: Dates Disappear in WordPress Editor
Solution: Change Bricks Forge date storage format from Ymd to Y-m-d
Issue: Dynamic Tags Don’t Display
Solutions:
- Use Text element (not Basic Text)
- Enable dynamic data for the element
- Ensure you have admin privileges
- Test with simple tag first:
{orb_cf_priority}
Issue: Priority Values Don’t Match
Solution: Use exact values: high, normal, low (lowercase)
Task Status Display
- Heading:
{post_title} - Priority Badge: “Priority:
{orb_cf_priority}“ - Due Date: “Due:
{orb_cf_due_date}“ - Status Indicator: “Status:
{orb_cf_approval_status}“
Key Takeaways
- Date format is critical – Always use
Y-m-din Bricks Forge to prevent data loss - Exact meta keys matter – Use the complete
_orb_cf_prefix format - Test everything – Submit forms and verify data flows correctly to Orbital
- Start simple – Build basic form first, then add advanced features
- Admin access required – Current integration needs administrator privileges
Conclusion
The OrbitalWP and Bricksforge Integration combines the power of the Pro Form with Orbital’s WordPress project management toolkit. Make sure to review the dynamic data tags and custom query loop documentation to understand how are when to use these Orbital features inside Bricks Builder. When user’s ask for help with their form setup, the most common mistakes made or misspelled dynamic data tags. If you need help, don’t hesitate to drop us a note through the support form.